Technical Contents
Engineering Guide: Milling Machine Blueprints

Engineering Insight: The Critical Role of Precision in Milling Machine Blueprints
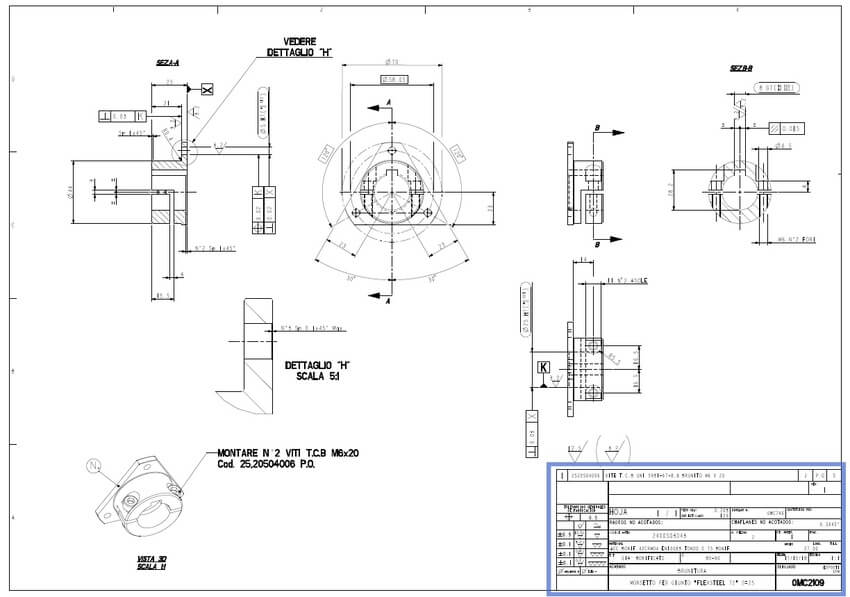
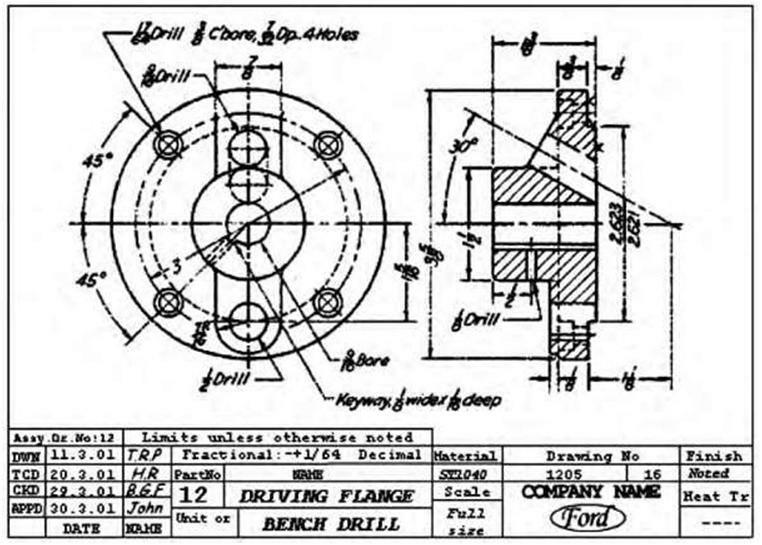
In the realm of high-end manufacturing, the blueprint of a milling machine is far more than a technical drawing—it is the foundational document that defines performance, reliability, and repeatability. At Wuxi Lead Precision Machinery, we understand that precision in design translates directly into precision in execution. Every contour, tolerance, and alignment specification embedded in a milling machine blueprint determines how effectively the machine will perform under the most demanding industrial conditions.
Our engineering philosophy centers on the principle that microscopic deviations in design can lead to macroscopic failures in application. This is especially critical in sectors such as aerospace, defense, and high-performance automotive, where component integrity is non-negotiable. The blueprints we develop are not merely guides for assembly; they are comprehensive mathematical models that anticipate thermal expansion, dynamic load distribution, and long-term wear characteristics. This predictive accuracy stems from over a decade of specialized experience in precision CNC machining, including projects commissioned for Olympic-standard equipment and military-grade components.
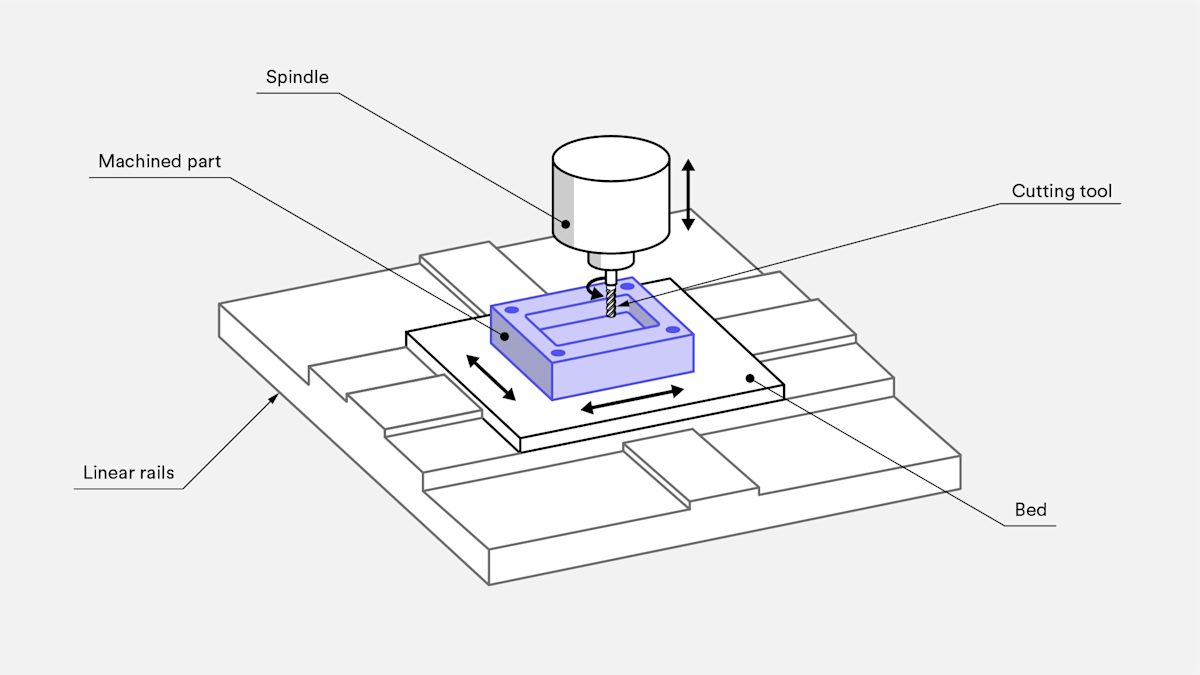
The integrity of a milling machine’s structure begins with the rigidity of its frame, the alignment of its spindle, and the precision of its linear guidance systems—all of which are defined in the blueprint. At Lead Precision, we employ finite element analysis (FEA) and 5-axis simulation software during the design phase to validate structural performance before any metal is cut. This ensures that every machine we produce meets micron-level tolerances consistently across production runs.
Our involvement in mission-critical applications has sharpened our focus on fail-safe design protocols. For example, blueprints for machines used in defense applications incorporate redundancy in critical load paths and enhanced vibration damping geometries. Similarly, machines developed for Olympic training equipment demanded flawless surface finish and motion control, pushing our design team to refine spindle housing tolerances to ±0.001 mm.
This level of precision is not achieved through equipment alone—it is engineered into the blueprint from the outset. Our design team integrates real-world machining data into every iteration, creating a feedback loop that continuously improves accuracy and functionality.
Below are key specifications that define the precision standards upheld in our milling machine blueprints:
| Specification | Value | Tolerance |
|---|---|---|
| Positioning Accuracy (X/Y/Z) | ±0.005 mm | ISO 230-2 |
| Repeatability (3D) | ±0.002 mm | ISO 230-2 |
| Spindle Runout | ≤ 0.001 mm | at nose |
| Linear Guide Parallelism | ≤ 0.003 mm/m | per axis |
| Thermal Compensation System | Integrated | Real-time |
| Surface Finish Capability | Ra 0.4 μm | with finishing cycle |
At Wuxi Lead Precision Machinery, we treat every blueprint as a commitment to excellence. Our legacy in high-stakes manufacturing environments has instilled a culture where precision is not optional—it is engineered into every line, dimension, and note on the page.
Precision Specs & Tolerances

Technical Capabilities: Precision Execution for Demanding Milling Requirements
At Wuxi Lead Precision Machinery, our technical foundation is built upon advanced 5-axis CNC milling technology, enabling us to transform complex blueprints into high-integrity components with uncompromising accuracy. Our Haas and DMG MORI multi-axis machining centers deliver simultaneous 5-axis movement, eliminating secondary setups and preserving critical geometric relationships across intricate geometries. This capability is essential for aerospace structural brackets, medical implant fixtures, and energy sector turbine components where angular features and undercuts define functional performance. We routinely machine challenging materials including Inconel 718, titanium Grade 5, hardened tool steels (up to 60 HRC), and high-temperature composites, maintaining thermal stability through precision coolant management and adaptive toolpath strategies. Material utilization efficiency exceeds 92% across production runs, minimizing waste without sacrificing dimensional control.
Quality assurance is integrated at every process stage, anchored by Zeiss CONTURA G3 coordinate measuring machines (CMM) operating within ISO 17025-accredited environmental controls. Each component undergoes full-spectrum inspection against ASME Y14.5 and ISO 1101 standards, with digital reports documenting true position, profile, flatness, and surface finish deviations. Our CMM fleet features 0.5 µm volumetric accuracy and automated temperature compensation, ensuring measurement repeatability down to 1.5 µm. This metrology backbone provides traceable validation for first-article submissions and batch-critical features, directly supporting clients’ PPAP and APQP compliance requirements. Statistical process control (SPC) data is actively monitored to preempt deviations, with corrective actions implemented within 30 minutes of threshold breaches.
Tolerance achievement is not theoretical but empirically verified through daily artifact calibration and cross-referenced with client-supplied master gauges. The table below reflects our proven production capabilities under controlled shop-floor conditions:
| Feature Type | Standard Capability | Precision Capability | Measurement Method |
|---|---|---|---|
| Dimensional (Linear) | ±0.010 mm | ±0.005 mm | CMM |
| Geometric (True Position) | ±0.015 mm | ±0.008 mm | CMM |
| Surface Finish (Ra) | 0.8 µm | 0.4 µm | Profilometer |
| Angularity | ±0.02° | ±0.005° | CMM |
| Repeatability (6σ) | 0.008 mm | 0.003 mm | In-process SPC |
Our engineering team collaborates directly with client design personnel during blueprint review to identify tolerance-critical zones, propose manufacturability enhancements, and establish inspection protocols that align with functional intent. This proactive approach prevents costly iterations while ensuring that every machined surface meets the operational demands of high-stress applications. With 12 years of specialization in tight-tolerance milling, Wuxi Lead delivers not just parts, but certified precision where micron-level consistency impacts system reliability and safety. Partner with us to convert your most challenging blueprints into field-proven components backed by measurable quality data.
Material & Finish Options

Material Selection in Precision CNC Milling: Aluminum, Steel, and Titanium
Selecting the appropriate material is a foundational decision in precision CNC milling, directly influencing component performance, durability, and manufacturability. At Wuxi Lead Precision Machinery, we specialize in high-tolerance milling operations and recommend a strategic approach to material selection based on mechanical requirements, environmental exposure, and finishing needs. Among the most widely used materials in aerospace, automotive, and medical manufacturing are aluminum, steel, and titanium—each offering distinct advantages.
Aluminum is favored for its excellent strength-to-weight ratio, thermal conductivity, and machinability. Grade 6061-T6 is particularly common in structural and prototype applications due to its weldability and corrosion resistance. While inherently softer than steel or titanium, aluminum responds exceptionally well to high-speed milling, allowing for tight tolerances and fine surface finishes. When enhanced durability and surface protection are required, anodizing is a preferred post-processing treatment. Anodizing creates a controlled oxide layer that improves wear resistance, prevents corrosion, and allows for color coding through dye integration. Type II (sulfuric acid) anodizing is standard for decorative and moderate-duty applications, while Type III (hardcoat anodizing) provides a thicker, more durable surface suitable for industrial environments.
Steel, particularly alloy grades such as 4140 and 4340, delivers superior strength, hardness, and fatigue resistance. These properties make steel ideal for high-load components like gears, shafts, and tooling fixtures. However, the increased hardness demands more robust tooling and slower machining parameters. Tool wear and heat generation must be carefully managed during milling to maintain dimensional accuracy. Post-machining heat treatments such as quenching and tempering are often necessary to achieve the desired mechanical properties. Surface finishes for steel typically involve passivation, plating, or powder coating, depending on the application environment.
Titanium, especially Grade 5 (Ti-6Al-4V), offers an unmatched combination of high strength, low density, and exceptional corrosion resistance, making it a staple in aerospace and biomedical applications. However, titanium’s low thermal conductivity and high chemical reactivity present unique challenges in CNC milling. Heat concentrates at the cutting zone, increasing tool wear and the risk of material galling. Specialized cutting tools, lower RPMs, and consistent coolant application are essential to achieve precision results. Finishing treatments for titanium often include chemical passivation or specialized coatings to enhance surface integrity.
Understanding these material characteristics ensures optimal part performance and cost-efficiency. Below is a comparative summary of key properties.
| Material | Common Grade | Tensile Strength (MPa) | Density (g/cm³) | Key Applications | Recommended Finishes |
|---|---|---|---|---|---|
| Aluminum | 6061-T6 | 310 | 2.7 | Enclosures, brackets, heat sinks | Anodizing (Type II/III), bead blast |
| Steel | 4140 | 655 | 7.85 | Shafts, tooling, structural parts | Passivation, plating, powder coat |
| Titanium | Ti-6Al-4V (Gr 5) | 900 | 4.43 | Aerospace, medical implants | Passivation, thermal spray coating |
At Wuxi Lead Precision Machinery, we integrate material science with advanced CNC capabilities to deliver components that meet exacting industry standards.
Manufacturing Process & QC

Precision Production Process: From Blueprint to Zero-Defect Delivery
At Wuxi Lead Precision Machinery, our production process for milling machine components integrates rigorous engineering discipline with advanced manufacturing execution. This ensures every part meets the exacting standards demanded by high-end industrial applications. The journey begins with comprehensive design validation. Our engineering team meticulously reviews client blueprints using advanced CAD/CAM systems, focusing on geometric dimensioning and tolerancing (GD&T) compliance and manufacturability. We conduct virtual simulations to identify potential stress points, toolpath interferences, and thermal deformation risks before any material is cut. This phase is critical for preventing downstream errors and establishing a robust foundation for zero-defect production. Client collaboration is mandatory at this stage to confirm all specifications and surface finish requirements are unambiguously defined.
Prototyping serves as the indispensable physical verification step. Utilizing our high-precision 5-axis machining centers, we produce initial sample components under controlled conditions mirroring mass production parameters. Each prototype undergoes exhaustive metrology: coordinate measuring machines (CMM) verify dimensional accuracy against the digital blueprint, surface roughness testers confirm finish criteria, and non-destructive testing checks for internal integrity. We provide detailed first-article inspection reports (FAIR) for client approval. Only upon formal sign-off do we proceed, ensuring the prototype validates both the design intent and our process capability. This step eliminates assumptions and guarantees the manufacturing process is proven before scaling.
Mass production deployment leverages the validated process with unwavering adherence to quality protocols. Our CNC cells operate under strict Statistical Process Control (SPC), continuously monitoring critical parameters like tool wear, spindle load, and thermal drift in real-time. Automated in-process gauging checks key features during machining, triggering immediate corrective actions if deviations approach tolerance limits. Every component undergoes 100% critical dimension verification using calibrated metrology equipment, not just random sampling. Operator training emphasizes proactive defect prevention and rapid root-cause analysis. This closed-loop system, combined with our certified ISO 9001:2015 quality management framework, systematically drives towards zero defects. The result is consistent, high-yield production where every part shipped meets the blueprint specification without compromise.
Core Production Capabilities for Milling Components
| Specification Category | Performance Metric | Measurement Standard |
|---|---|---|
| Maximum Machining Envelope | 1200 x 800 x 600 mm | ISO 230-2 |
| Positioning Accuracy (X/Y/Z) | ± 0.003 mm | ISO 230-2 |
| Repeatability (X/Y/Z) | ± 0.002 mm | ISO 230-2 |
| Spindle Speed Range | 20 – 24,000 RPM | ISO 2047 |
| Surface Roughness (Achieved) | Ra 0.4 µm (Typical) | ISO 4287 |
This integrated approach transforms blueprint specifications into flawless physical reality. By embedding quality at every phase—design validation, physical prototyping, and controlled mass production—we eliminate waste, reduce client risk, and deliver the precision reliability Wuxi Lead Precision Machinery is engineered to provide. Zero defects is not an aspiration; it is the measurable outcome of our disciplined process.
Why Choose Wuxi Lead Precision
Partner with Lead Precision for Unmatched Expertise in CNC Milling Machine Blueprints
At Wuxi Lead Precision Machinery, we understand that precision begins long before the first cut is made. It starts with a blueprint—detailed, accurate, and engineered to meet the exact demands of high-performance manufacturing. As a trusted leader in precision CNC machining based in China, we specialize in transforming conceptual designs into fully realized, production-ready milling machine blueprints that drive efficiency, repeatability, and quality across industries such as aerospace, automotive, medical devices, and advanced automation.
Our engineering team brings over 15 years of experience in CNC machine design and manufacturing process optimization. When you partner with Lead Precision, you’re not just outsourcing a drafting task—you’re gaining a strategic collaborator committed to technical excellence. We integrate advanced CAD/CAM software with deep practical knowledge of milling dynamics, toolpath optimization, and machine rigidity to deliver blueprints that ensure peak machine performance, minimal downtime, and long-term reliability.
Every blueprint we produce is tailored to your operational requirements, material specifications, and production volume. We conduct rigorous design reviews, structural simulations, and tolerance analysis to guarantee that each component functions seamlessly within the larger machine architecture. From 3-axis to 5-axis CNC milling configurations, our designs support high-speed machining, complex geometries, and micron-level accuracy.
We also prioritize manufacturability and serviceability in every blueprint, ensuring that your machines are not only precise but also easy to maintain and upgrade over time. Our design standards align with international quality benchmarks, including ISO 9001:2015, ensuring compliance and consistency across global supply chains.
Below are key specifications and capabilities that define our blueprint development process:
| Specification | Details |
|---|---|
| Design Software | SolidWorks, AutoCAD, Siemens NX, Mastercam |
| Machine Types Supported | 3-axis, 4-axis, 5-axis CNC milling machines |
| Tolerance Range | ±0.005 mm to ±0.02 mm (depending on application) |
| Material Compatibility | Aluminum, steel, stainless steel, titanium, composites |
| Output Formats | DWG, DXF, STEP, IGES, PDF, native CAD files |
| Lead Time (Standard) | 7–14 business days, expedited options available |
| Compliance Standards | ISO 9001:2015, GD&T (ASME Y14.5), RoHS |
Partnering with Wuxi Lead Precision Machinery means investing in precision that scales. Whether you’re developing a single prototype or launching a full production line, our blueprints serve as the foundation for machines that perform under the most demanding conditions.
Take the next step toward engineering excellence. Contact us today at [email protected] to discuss your milling machine blueprint requirements. Let our team help you turn vision into precision reality.
⚙️ Precision Cost Estimator
Estimate relative manufacturing effort based on tolerance.

